
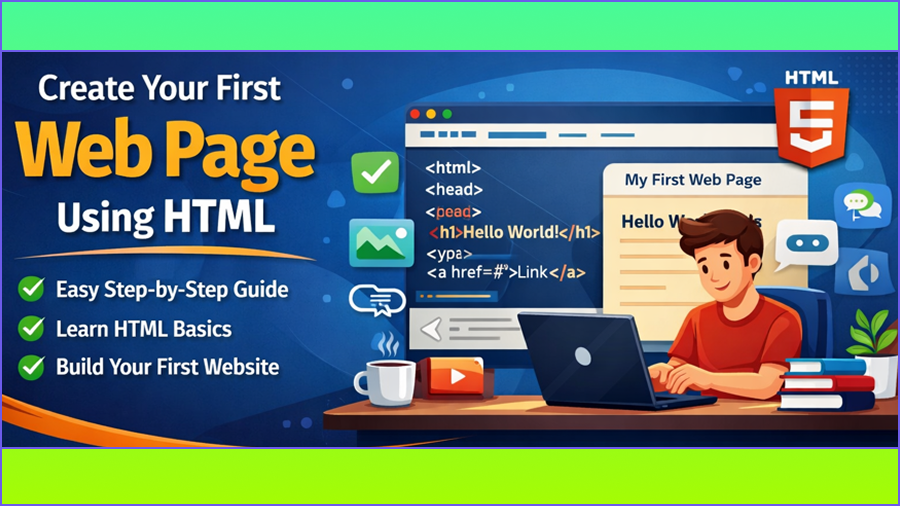
If you are new to web development, creating your first web page using HTML is an exciting moment. HTML is the first language every web developer learns because it forms the base of the entire web. The good news is that you do not need any special software or advanced knowledge to get started.
In this blog, you will learn step by step how to create your first web page using HTML. This guide is written for absolute beginners, so everything is explained in a simple and clear way.
By the end of this article, you will:
- Understand what you need to create a web page
- Write your first HTML code
- Save and open your web page in a browser
- Understand each part of the code
What Is a Web Page?
A web page is a document that is displayed in a web browser. It contains text, images, links, and other content that users can see and interact with.
Web pages are created using HTML, which tells the browser:
- What content to show
- How the content is structured
Every website you visit is made up of one or more web pages.
What Do You Need to Create Your First Web Page?
To create your first web page using HTML, you only need two things:
- A text editor
This is where you write HTML code.
Example: Notepad, VS Code, or any simple text editor. - A web browser
This is used to view your web page.
Example: Chrome, Edge, Firefox.
No internet connection is required once you have these.
Step 1: Create a New HTML File
First, you need to create a new file.
- Open your text editor
- Create a new file
- Save the file with a .html extension
Example file name:
index.html
The .html extension tells the browser that this file contains HTML code.
Step 2: Write the Basic HTML Structure
Every HTML page follows a basic structure. Let’s write that structure first.
<!DOCTYPE html>
<html>
<head>
    <title>My First Web Page</title>
</head>
<body>

</body>
</html>
This is the skeleton of your web page.
Now let’s understand each part.
Understanding the HTML Structure
1. <!DOCTYPE html>
This line tells the browser that the document is an HTML5 page.
It helps the browser display the page correctly.
2. <html> Tag
<html>
</html>
This tag wraps the entire webpage.
All HTML content must be written inside it.
3. <head> Section
<head>
    <title>My First Web Page</title>
</head>
The head section contains information about the page, not visible content.
The <title> tag defines the text shown on the browser tab.
4. <body> Section
<body>

</body>
The body section contains everything that appears on the screen, such as text, images, and buttons.
Step 3: Add Content to Your Web Page
Now let’s add some visible content inside the body section.
<body>
    <h1>Welcome to My First Web Page</h1>
    <p>This is my first web page created using HTML.</p>
</body>
Understanding the Content Tags
<h1> – Heading Tag
<h1>Welcome to My First Web Page</h1>
- This is the main heading of the page
- It tells users what the page is about
- Each page should usually have one main heading
<p> – Paragraph Tag
<p>This is my first web page created using HTML.</p>
- Used for normal text
- Makes content readable
- Automatically adds spacing
Step 4: Add More Elements to Your Page
Let’s make the page a little more interesting by adding more elements.
<body>
    <h1>Welcome to My First Web Page</h1>

    <p>Hello! My name is John. I am learning HTML and this is my first web page.</p>

    <h2>What I Am Learning</h2>

    <ul>
        <li>HTML Basics</li>
        <li>Web Page Structure</li>
        <li>Basic Tags</li>
    </ul>
</body>
Explanation of New Tags
<h2> – Subheading
Used for section titles under the main heading.
<ul> and <li> – List Tags
<ul>creates a bullet list<li>defines list items
Lists help organize information clearly.
Step 5: Add an Image (Optional)
Images make web pages more attractive.
<img src="photo.jpg" alt="My Photo">
Explanation:
srctells where the image file isaltdescribes the image
The image file should be in the same folder as the HTML file.
Step 6: Save and Open Your Web Page
Once you have written your code:
- Save the file
- Right-click on the file
- Open it with a web browser
You will now see your first web page live on the screen
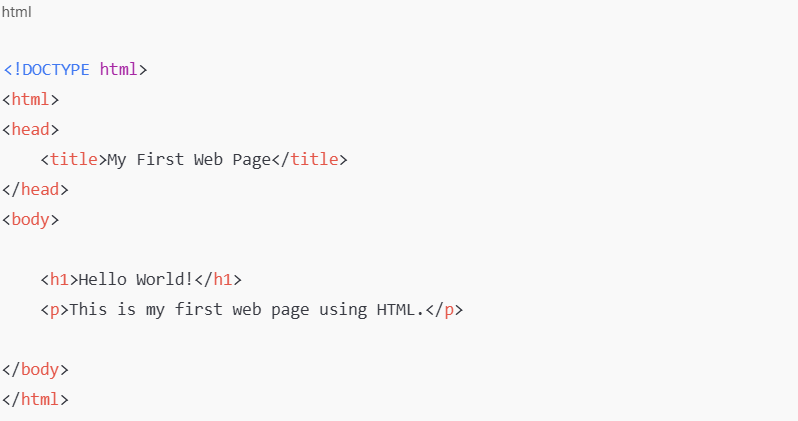
Complete Example of Your First Web Page
<!DOCTYPE html>
<html>
<head>
    <title>My First Web Page</title>
</head>
<body>

    <h1>Welcome to My First Web Page</h1>

    <p>This web page is created using basic HTML.</p>

    <h2>Topics I Am Learning</h2>

    <ul>
        <li>HTML Structure</li>
        <li>HTML Tags</li>
        <li>Web Development Basics</li>
    </ul>

    <p>Thank you for visiting my page.</p>

</body>
</html>
Common Beginner Mistakes
Forgetting to save file as .html
Writing code outside <body>
Missing closing tags
Using wrong file names
Not refreshing the browser
Avoiding these mistakes makes learning easier.
Best Practices for Beginners
Always start with basic structure
Use proper indentation
Keep code clean and readable
Practice small examples
Open the file in a browser regularly
What You Learn After Creating Your First Page
After creating your first HTML page, you will:
- Understand how HTML works
- Feel confident with basic tags
- Be ready to learn CSS and JavaScript
- Know how websites are built
This first step is very important in your web development journey.
Final Thoughts
Creating your first web page using HTML is simple and rewarding. You do not need advanced tools or skills—just curiosity and practice. HTML teaches you how the web is structured and prepares you for more advanced technologies.
Once you build your first page, learning web development becomes fun and motivating.
Your journey into the world of web development officially begins here

Pingback: Block vs Inline Elements in HTML (Simple Guide) 7 - litecodify.com